概览:
pve介绍
官网 proxmox
Proxmox Virtual Environment is an open source server virtualization management solution based on QEMU/KVM and LXC. You can manage virtual machines, containers, highly available clusters, storage and networks with an integrated, easy-to-use web interface or via CLI. Proxmox VE code is licensed under the GNU Affero General Public License, version 3. The project is developed and maintained by Proxmox Server Solutions GmbH.
简单来说,pve是一个开源的虚拟化管理解决方案。pve是一个软件包,但目前为止只提供debian的软件包,如果没有特殊需求,可以直接下载官方镜像(下一章节会说到)。
首先安装pve需要有一个物理机器(推荐做法)
pve安装
下载rufus,创建可引导的USB驱动器。
下载pve ISO,pve的基础得便镜像。
还需要准备一个u盘,注意⚠️该过程会格式化u盘,所以需要注意及时备份U盘数据方可继续下一步。
宿主机
选择和购买(可选)
若已经有机器安装pve,可以跳过该小节。
首先先上需求
- 虚拟机
- TrueNas * 1,存储池,统一管理其他电脑以及k8s集群的共享存储。
- 远程编程环境 * 1,该机器上面部署好各类工具,方便远程构建以及其他事项。
- Kubernetes集群 * 4,逐步学习及使用k8s的相关知识并了解云原生,并在该环境进行研究。
通过查询以上系统的主机要求和对以后的扩展性综合考虑,我选择了(俗尘洋垃圾)的E5-2683 v4这款,intel官网说明,基本配置如下,主板 * 1,CPU * 1,内存 * 4,机械硬盘若干,nvme硬盘若干。
CPU E5-2683 v4 16核32线程 频率2.1~3.0 TDP功耗120W
主板 X10SRL-F
内存 三星 DDR4-2400 REG ECC 32G
其他 机械硬盘,pcie扩展卡等
开始安装
我的配置如下
安装可以参考B站UP主 司波图
选择网卡时请注意,pve会绑定一个网卡,如果后期要更改很慢饭,所以请配置好后再开始,如配置静态ip等。
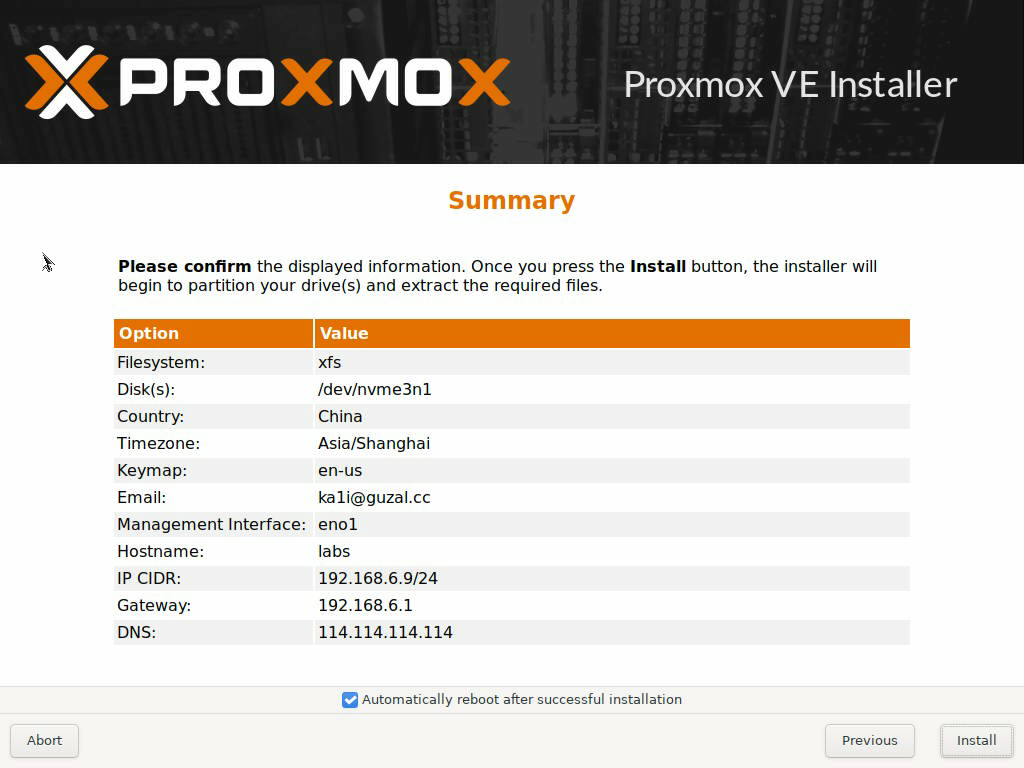
安装效果一览
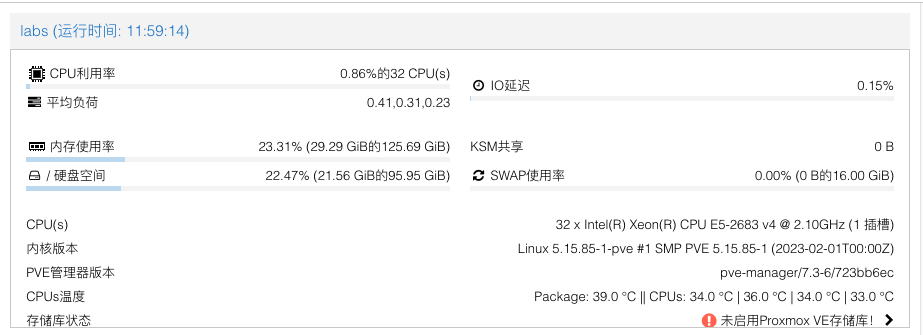
注意⚠️ 上图中的CPUs温度时需要自己添加的,接下来就会讲到。
进行配置
换镜像源
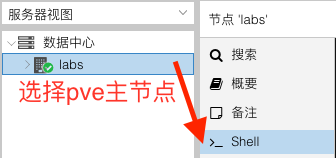
进入shell,在shell中操作。
覆盖系统镜像
nano /etc/apt/sources.list
1 | deb https://mirrors.ustc.edu.cn/debian/ bullseye main contrib |
pve源更换(未订阅)
1 | mv /etc/apt/sources.list.d/pve-enterprise.list /etc/apt/sources.list.d/pve-no-subscription.list |
nano /etc/apt/sources.list.d/pve-no-subscription.list
1 | deb https://mirrors.ustc.edu.cn/proxmox/debian/pve bullseye pve-no-subscription |
更新一下
1 | apt update # 更新镜像源缓存 |
自定义
界面添加CPUs温度显示
1 | apt install lm-sensors |
添加数据源
vim /usr/share/perl5/PVE/API2/Nodes.pm
位置大概在 head -n +410 /usr/share/perl5/PVE/API2/Nodes.pm | tail -n 30
1 | $res->{pveversion} = PVE::pvecfg::package() . "/" . |
添加显示格式
vim /usr/share/pve-manager/js/pvemanagerlib.js
位置大概在 head -n +38656 /usr/share/pve-manager/js/pvemanagerlib.js | tail -n 30
1 | { |
取消订阅提醒警告
vim /usr/share/javascript/proxmox-widget-toolkit/proxmoxlib.js
位置大概在 head -n +539 /usr/share/javascript/proxmox-widget-toolkit/proxmoxlib.js | tail -n 30
1 | Proxmox.Utils.API2Request( |
修改为一下内容
1 | //if (res === null || res === undefined || !res || res |
修改lxc(CT)的源
1 | cd /usr/share/perl5/PVE/ |
注意⚠️:添加CPUs温度显示,取消订阅提醒告警等操作,需要重启pve系统或执行
systemctl restart pveproxy.service方可生效,然后一定要清理浏览器缓存,否则页面不会显示新变化。如若有异常情况,请根据实际情况排查,提醒可以sensors-detect再重启一下pve。
磁盘配置
磁盘规划,默认情况下会有local和local-lvm。
我去掉了local的内容里的VZDump备份文件。由于我准备将备份放置于另外一块硬盘。
如果虚拟机数量不多,就按默认的分配进行就可,可以跳过本小节。
格式化
我是准备了IT的nvme盘作为虚拟机的系统磁盘(注意:不是pve的系统盘,是给安装在pve上的虚拟机使用)
挂载1T新硬盘盘到/VMs步骤 :
cfdisk新建分区(删除多余的分区)格式化新分区
mkfs.xfs -f /dev/nvme1n1p1 -L VMs
lsblk查看nvme名称与大小对应关系然后
blkid | grep <nvme名称>获取UUID然后填写到
/etc/fstab文件,如下所示
1 | UUID=9ef40821-a3d6-415a-82d3-76c22caf33d3 /VMs xfs defaults 0 0 |
检查是否正确
mount -a,然后df -h | grep VMs,如下所示挂载成功。
1 | root@labs:~# mkdir /VMs |
添加新盘
数据中心 > 存储 > 选择 | 添加 > 选择 | 目录
1 | ID: VMs, 目录: /VMs, 内容: 磁盘映像,VZDump备份文件 |
硬件直通
因为,有时考虑到需要给TrueNas虚拟机需要直通像SATA硬盘等,以期最好的性能。因为pve是在debian(一个linux发行版)上的系统,所以还是进入shell操作。
编辑grub
1 | vi /etc/default/grub |
更新grub
1 | update-grub2 |
添加模块
1 | echo vfio >> /etc/modules |
重启pve后生效